
Winter doesn’t have to mean hitting pause on composting. In fact, a well-built winter compost pile can quietly keep breaking down kitchen scraps and garden waste—even when temperatures drop. The key is knowing how to set it up so it stays active, insulated, and easy to manage all season long.
Below is a simple, beginner-friendly guide to building a winter compost pile that actually works—without turning into a frozen mess.
Why Winter Composting Is Worth It
It’s easy to assume composting stops in winter, but that’s not true. While decomposition slows down, it doesn’t stop completely.
Winter composting helps you:
- Reduce household waste year-round
- Prepare rich compost for spring gardens
- Keep good composting habits consistent
- Avoid storing scraps indoors for months
With the right setup, your pile will keep doing its thing—even under snow.
Choose the Right Location First
Before adding a single scrap, location matters more in winter than any other season.
Look for a spot that:
- Gets some sun exposure during the day
- Is sheltered from strong winter winds
- Is easy to reach when paths are snowy
- Drains well and doesn’t collect water
Placing your compost near a fence, shed, or wall helps trap warmth and makes winter access much easier.
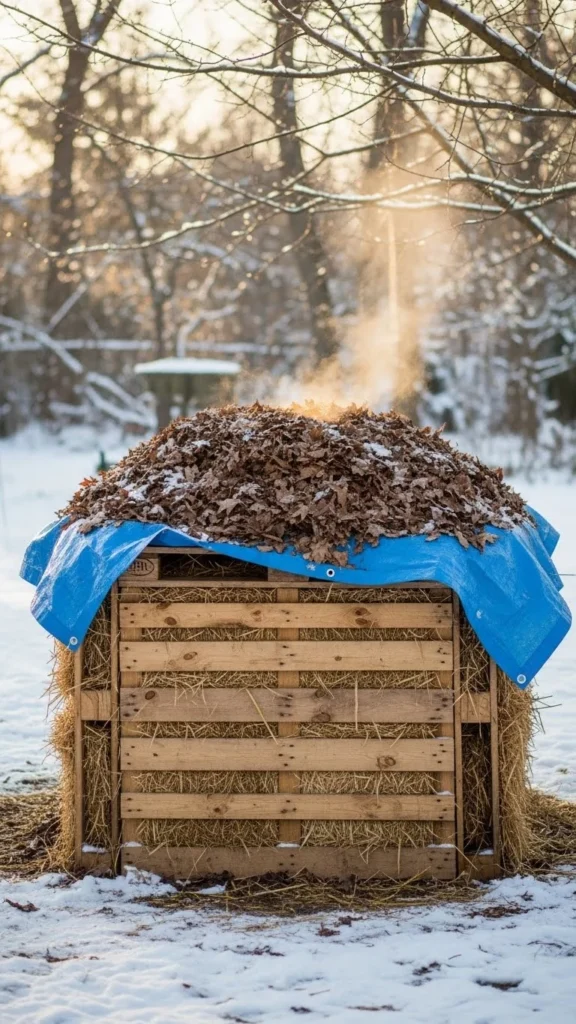
Build the Base for Insulation and Drainage
A strong base keeps your compost active and prevents freezing from the ground up.
Start with:
- Twigs or small branches for airflow
- Straw, dried leaves, or wood chips
- A layer at least 6–8 inches thick
This bottom layer acts like insulation and helps excess moisture drain away.
Balance Greens and Browns the Smart Way
Winter composting works best when the pile is well-balanced from the start.
Greens (nitrogen-rich):
- Fruit and vegetable scraps
- Coffee grounds
- Fresh plant trimmings
Browns (carbon-rich):
- Dried leaves
- Shredded cardboard
- Paper towels and paper bags
Aim for more browns than greens in winter. Browns add insulation and prevent the pile from becoming soggy or smelly.
Tip: Save extra dried leaves in fall so you always have browns ready.
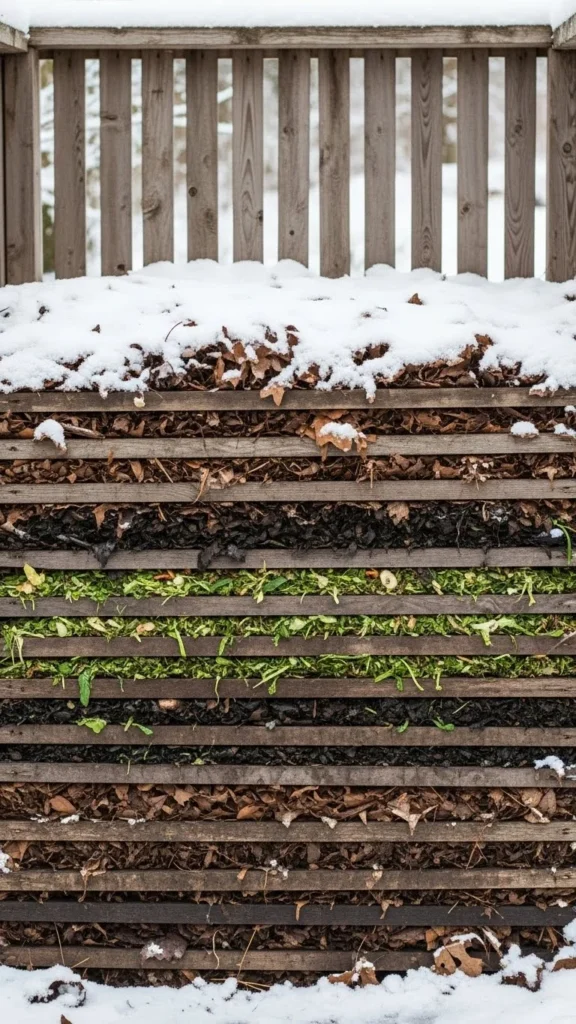
Layer, Don’t Dump
Instead of tossing scraps randomly, layer them for better heat retention.
A simple winter layering method:
- Browns on the bottom
- A thin layer of greens
- Cover with more browns
- Repeat as needed
Always finish with a brown layer on top. This keeps pests away and helps trap warmth inside the pile.
Keep Moisture in Check
Winter compost should be damp, not wet.
If it’s too dry:
- Add slightly moist greens
- Sprinkle a small amount of water on warmer days
If it’s too wet:
- Add more shredded cardboard or dry leaves
- Avoid compacting the pile
A good test: squeeze a handful. It should feel like a wrung-out sponge.
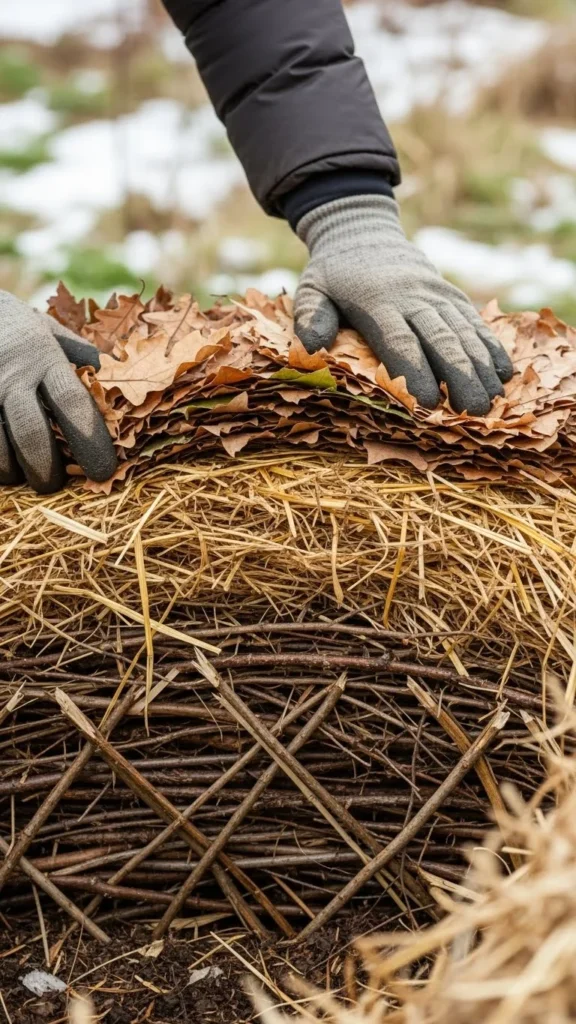
Insulate the Pile for Cold Weather
Insulation is the secret weapon of winter composting.
Easy insulation ideas:
- Wrap the bin with straw bales
- Cover the top with cardboard and leaves
- Use an old tarp or compost cover
- Add extra browns around the edges
This helps the center of the pile stay warmer, even during freezing nights.
Turn Less, But Not Never
In winter, turning the pile too often releases heat. Instead:
- Turn lightly once every 4–6 weeks
- Only turn during milder days
- Focus on mixing outer material into the center
If the pile freezes, don’t worry. It will restart naturally when temperatures rise.
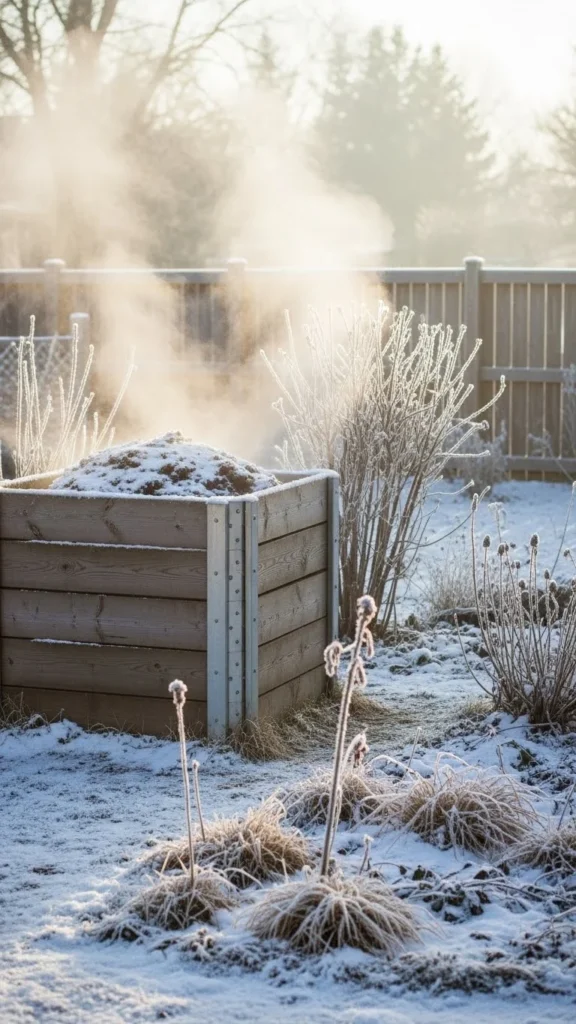
What to Expect (and What’s Normal)
Winter composting looks different—and that’s okay.
Totally normal signs:
- Slower breakdown
- Steam on warmer days
- Frozen outer layers
- Active center core
Come spring, your pile will already be halfway decomposed and ready to finish strong.
Final Takeaway
Building a winter compost pile isn’t about perfection—it’s about smart setup and simple habits. With the right balance, insulation, and layering, your compost can keep working quietly all winter long.
Save this guide for later, and let your compost pile do the heavy lifting—even in the cold

Leave a Reply