
Are your garden spaces feeling a little… plain? What if I told you that the key to a vibrant, eco-friendly garden could be hiding in your recycling bin? Plastic bottles aren’t just waste—they can become charming flower pots, colorful planters, and even whimsical garden art. With just a few simple tools and a touch of creativity, you can turn ordinary bottles into extraordinary decor that will make your garden pop!
Why Use Plastic Bottles for Garden Decor?
Before diving into projects, let’s talk about why plastic bottles are a gardener’s hidden treasure:
- Eco-friendly: Reusing bottles keeps them out of landfills.
- Cost-effective: No need to buy expensive pots or decorations.
- Customizable: Paint, cut, or shape bottles to match your style.
- Lightweight & durable: Perfect for hanging or stacking without heavy support.
It’s amazing how a simple bottle can transform into a centerpiece with just a little effort!
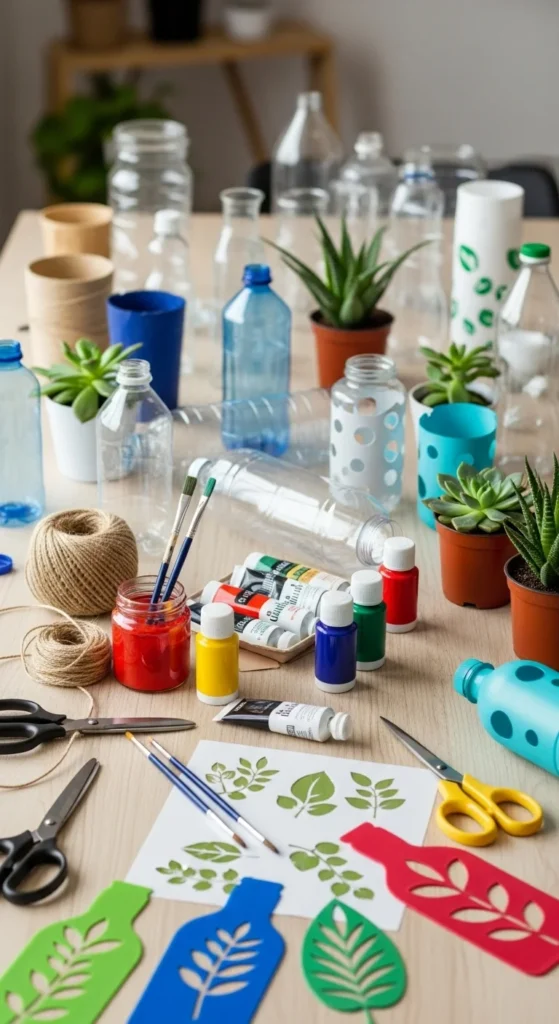
Supplies You’ll Need
Here’s a quick checklist to get started:
- Clean, empty plastic bottles (any size)
- Scissors or a craft knife
- Paints and brushes (optional)
- String, wire, or twine (for hanging designs)
- Soil and seeds or small plants
- Hot glue or waterproof adhesive (optional for attaching multiple pieces)
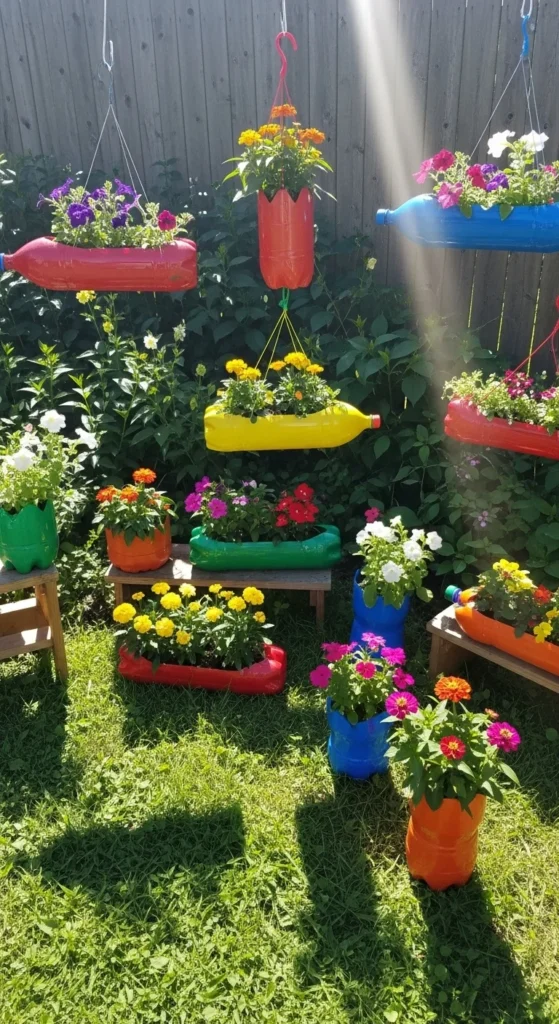
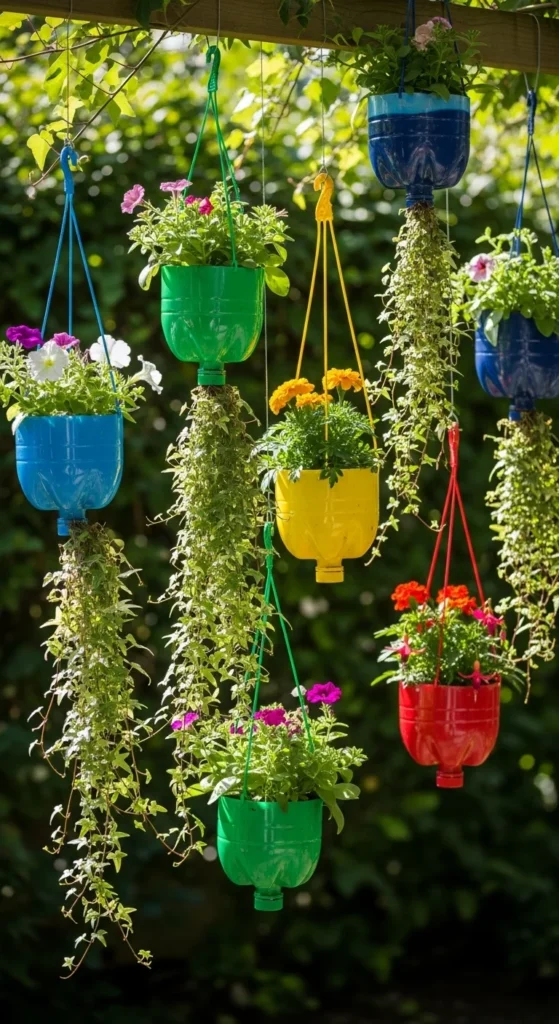
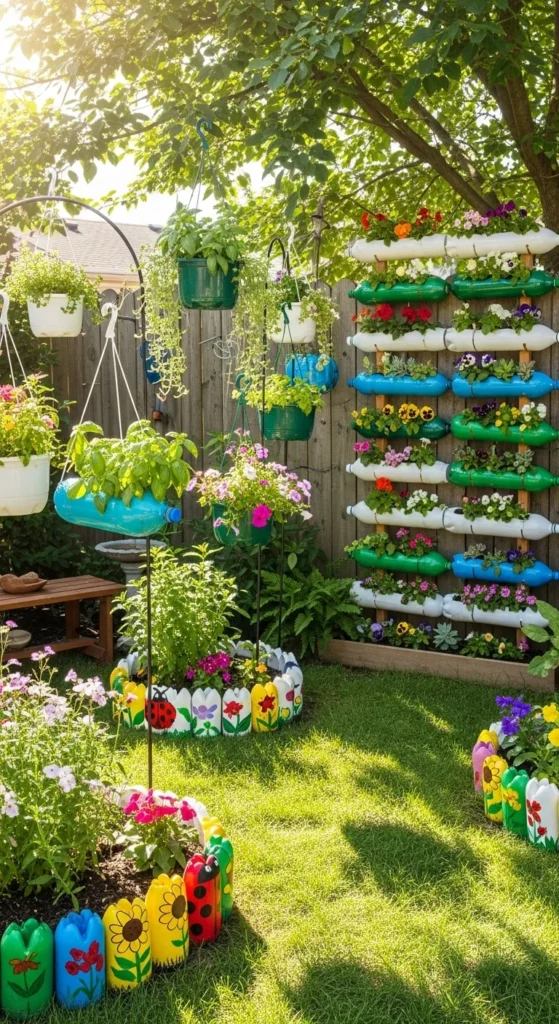
Step 1: Create Hanging Planters
Hanging planters are perfect for patios, balconies, or even a small window garden. Here’s how:
- Cut the bottle in half or cut a window along the side.
- Paint or decorate the bottle if desired.
- Fill with soil and add your favorite herbs, flowers, or succulents.
- Punch holes near the top and thread string or twine through for hanging.
- Hang in a sunny spot and water as needed.
Tips:
- Clear bottles let you see soil moisture—great for beginners.
- Use small bottles for herbs like basil or mint; larger bottles for flowers.
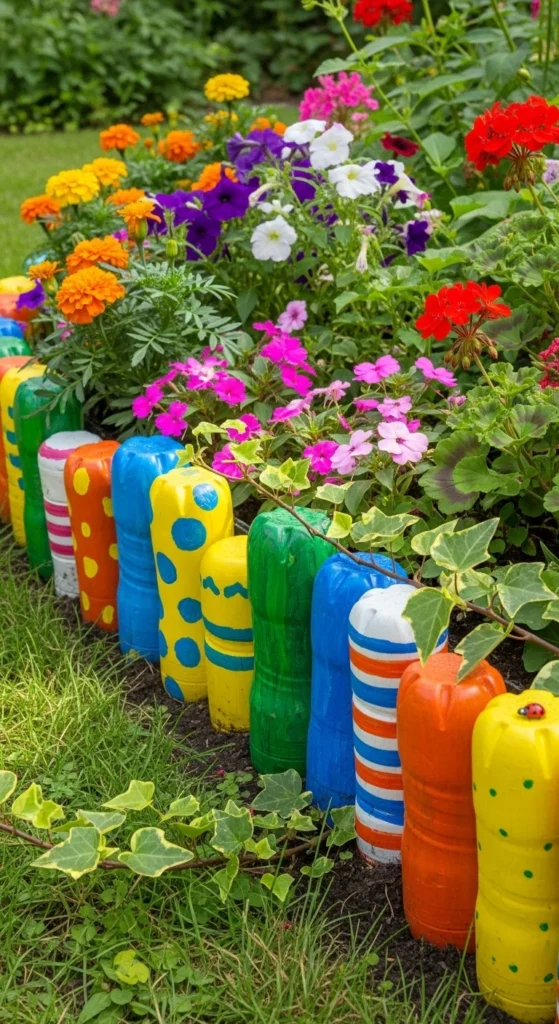
Step 2: Make Colorful Garden Borders
Plastic bottles can also be used to make quirky garden borders that add structure and color:
- Cut the bottoms off multiple bottles.
- Paint them in bright, cheerful colors.
- Push them upside down into the soil along flower beds or pathways.
- Optionally, fill them with small pebbles or sand for added stability.
Extra idea: Use bottle tops to create tiny mushroom or fairy-like decorations along the edges!
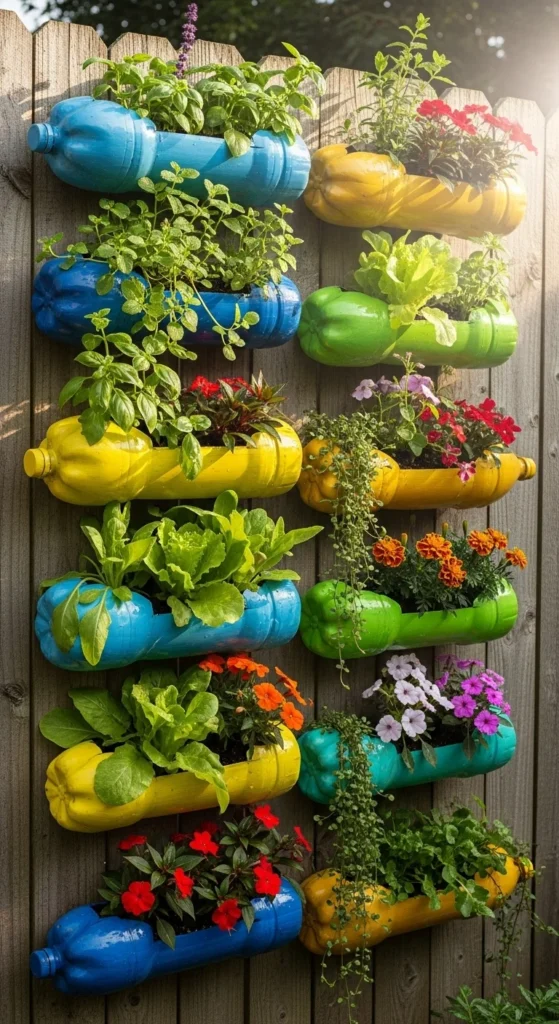
Step 3: Build Vertical Gardens
Short on space? Vertical gardens are a lifesaver. Here’s a simple approach:
- Cut several bottles horizontally or vertically.
- Stack and secure them using string, wire, or a wooden frame.
- Fill with soil and plant flowers, herbs, or small vegetables.
- Hang or lean the structure against a wall or fence.
Pro tip: Water from the top bottle and let excess trickle down—this keeps all plants hydrated efficiently.
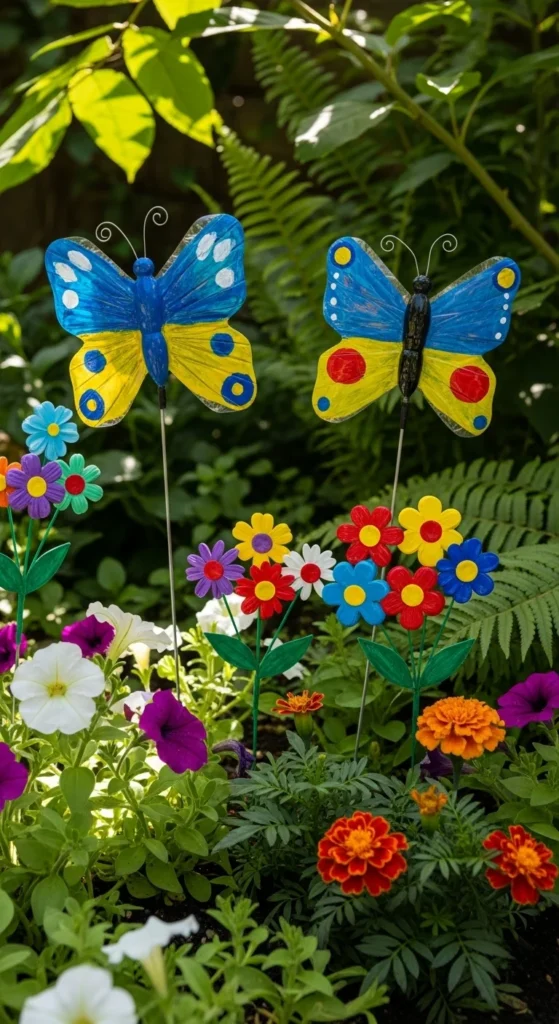
Step 4: Add Whimsical Touches
Let your creativity run wild! Plastic bottles can become:
- Butterflies and birds: Cut and paint bottle pieces to resemble wings or tails.
- Garden stakes: Bottle tops painted as flowers or characters on sticks.
- Lanterns: Cut designs into bottles, add a solar light inside for night-time charm.
These playful touches make your garden feel alive and unique.
Step 5: Maintain and Refresh
To keep your plastic bottle garden decor thriving:
- Check soil moisture regularly and water as needed.
- Touch up paint when it fades due to sun exposure.
- Rotate hanging bottles for even sunlight.
- Replace plants seasonally for fresh blooms and greenery.
These simple steps ensure your eco-friendly garden stays beautiful all year round.
Final Thoughts
Who knew a few discarded plastic bottles could transform your garden into a colorful, creative haven? Not only do these projects help the environment, but they also give your outdoor space personality and charm. Start small—maybe a hanging planter or a garden border—and watch your creativity bloom.
Save this guide for later and get ready to turn your recycling into a vibrant garden statement!

Leave a Reply