
There’s something magical about stepping into a garden that feels personal—like every corner tells a little story. DIY garden ornaments do exactly that. They add charm, creativity, and character without draining your wallet. The best part? You don’t need fancy tools or expert skills. With a few simple materials and a bit of imagination, you can create beautiful pieces that make your garden feel truly yours.
Whether you’re decorating a small balcony, a backyard, or a few pots by the door, this guide will walk you through easy, beginner-friendly ways to make DIY garden ornaments that actually last.
Start With Simple Materials You Already Have
Before buying anything, look around your home. Many great garden ornaments start with items you’d normally recycle or store away.
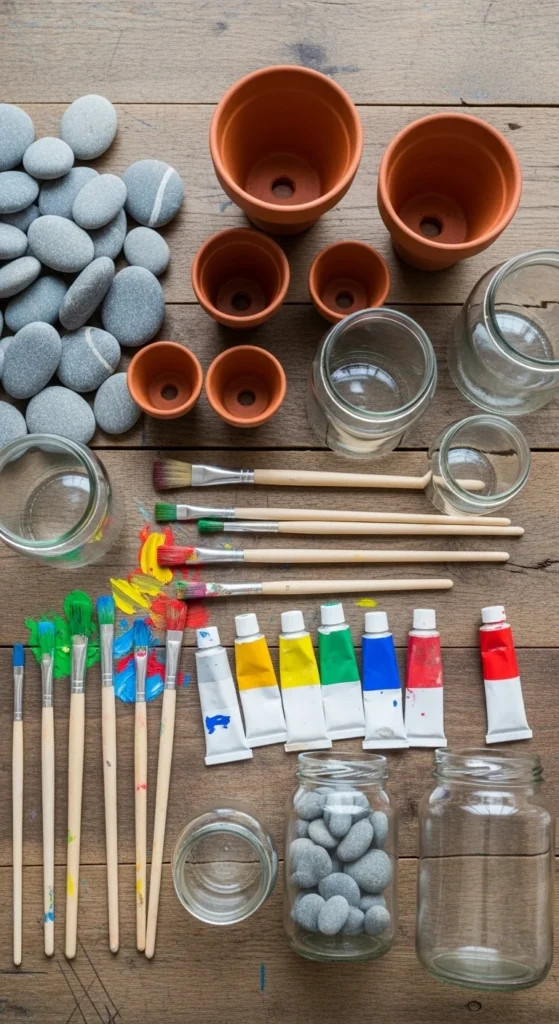
Common beginner-friendly materials:
- Old terracotta or plastic pots
- Smooth stones or pebbles
- Broken tiles or plates
- Glass jars or bottles
- Leftover paint or nail polish
- Cement mix (optional but useful)
The goal isn’t perfection. It’s creativity. Even mismatched items can look charming once they’re placed outdoors together.
Tip: Choose materials that can handle outdoor conditions. Seal paint and designs with a clear waterproof spray to help them last through rain and sun.
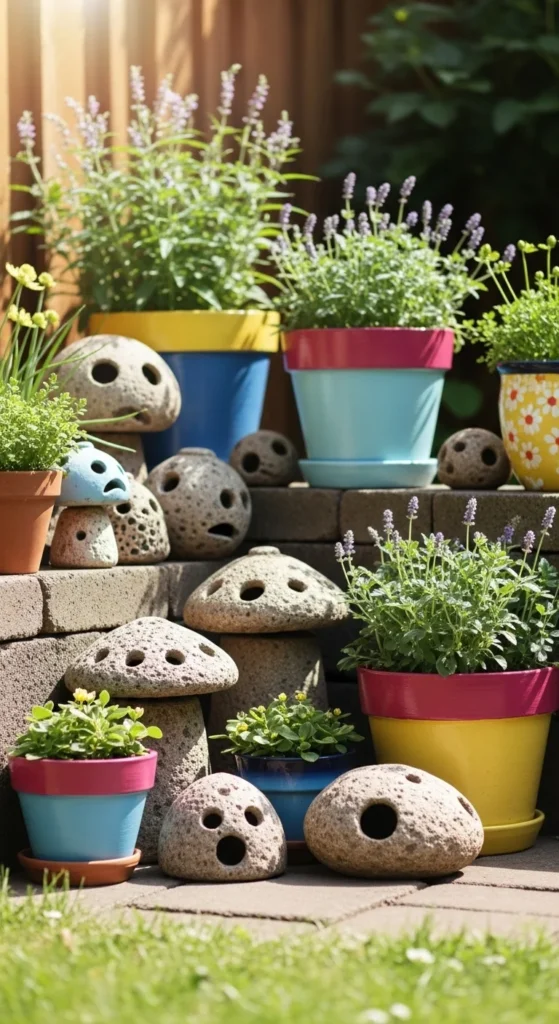
Easy Painted Stone Ornaments (Perfect for Beginners)
Painted stones are one of the easiest DIY garden ornaments to start with. They’re affordable, fun, and completely customizable.
How to make them:
- Wash and dry smooth stones.
- Paint a base color and let it dry.
- Add simple designs like flowers, leaves, dots, or ladybugs.
- Seal with a clear outdoor sealer.
Design ideas that always work:
- Soft floral patterns
- Simple words or symbols (optional, but subtle)
- Nature-inspired shapes like mushrooms or bees
These stones look great lining garden paths, tucked into planters, or grouped near the entrance.
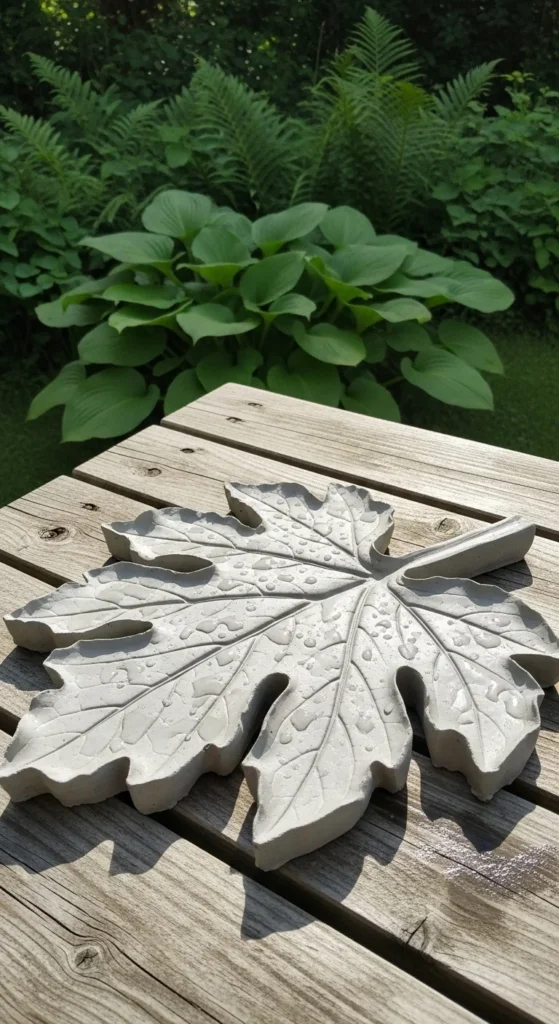
DIY Cement Ornaments for a Rustic Look
If you want something sturdier, cement ornaments are surprisingly easy to make and give your garden a timeless feel.
You can use:
- Plastic bowls or cups as molds
- Old muffin trays
- Silicone molds
Basic steps:
- Mix cement according to package instructions.
- Pour into molds and tap gently to remove air bubbles.
- Let dry for 24–48 hours.
- Remove from mold and sand rough edges.
Popular cement ornament ideas:
- Leaf-shaped stepping stones
- Small bowls for succulents
- Simple garden markers
You can leave them natural or lightly paint them for a soft, aged look.
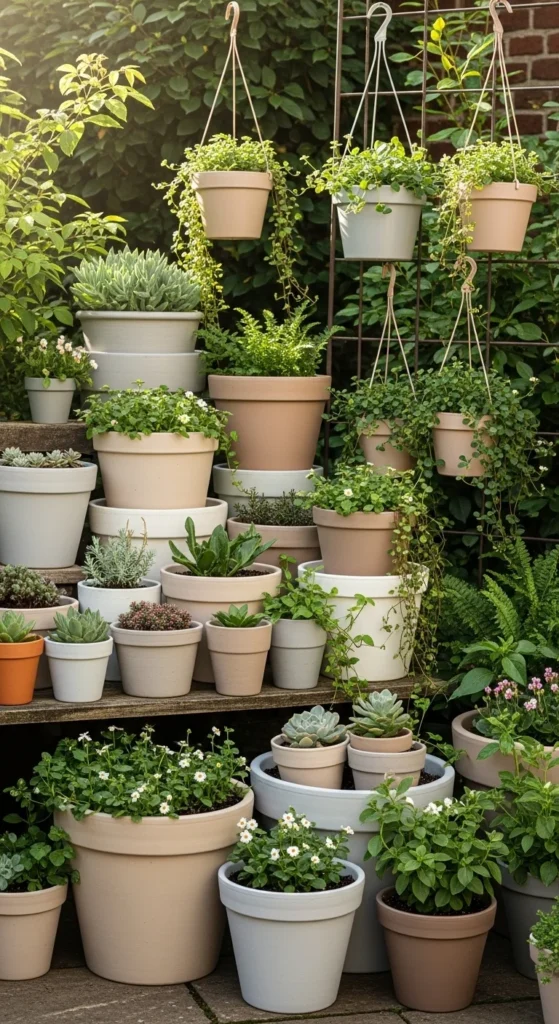
Turn Old Pots Into Statement Pieces
Old pots don’t need to be thrown away. With a little creativity, they can become standout garden ornaments.
Simple upgrades include:
- Painting them in soft neutral tones
- Adding stenciled patterns
- Wrapping twine or rope around the base
- Stacking pots vertically for a sculptural look
Try grouping pots of different sizes together. This creates visual interest and makes your garden feel styled, not cluttered.
Budget tip: Even chipped pots can look intentional when painted and grouped with plants.
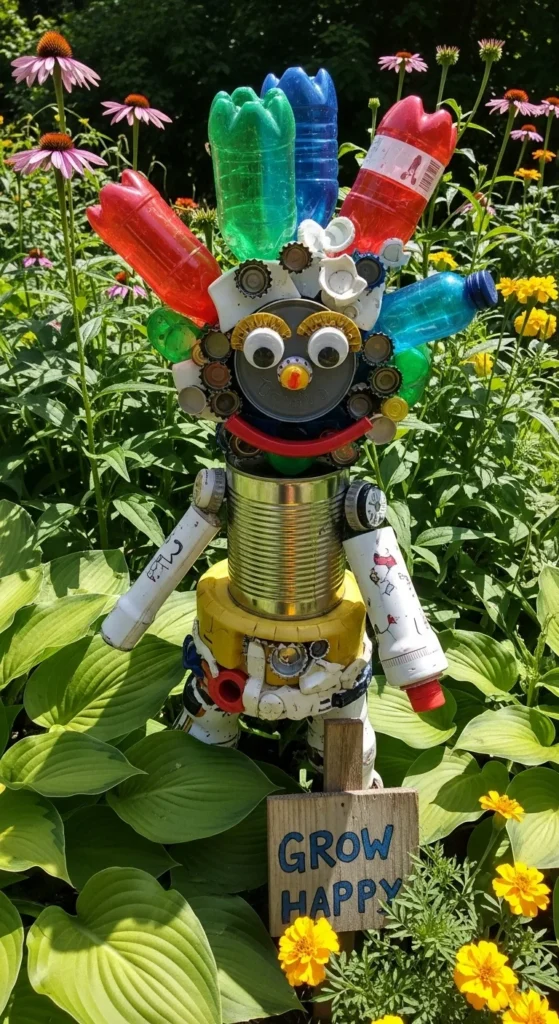
Fun DIY Garden Figures Using Recycled Items
Garden figures don’t need to be expensive store-bought pieces. You can create charming characters using recycled materials.
Easy ideas:
- Tin can lantern figures
- Bottle cap flowers
- Spoon or fork garden accents
- Stacked stone sculptures
Keep designs simple so they blend naturally into your garden instead of overpowering it. A little whimsy goes a long way.
Placement Tips That Make Ornaments Look Intentional
Even simple DIY pieces look better when placed thoughtfully.
Quick placement rules:
- Group ornaments in odd numbers (3 or 5 looks best).
- Mix heights for visual balance.
- Place ornaments near plants so they feel part of the landscape.
- Avoid overcrowding—space helps each piece stand out.
Walk through your garden after placing items and adjust as needed. Sometimes moving something just a few inches makes a big difference.
Final Thoughts: Make It Yours
DIY garden ornaments aren’t about perfection. They’re about expression. Every painted stone, reused pot, or handmade figure adds personality to your space and makes it feel welcoming.
Start small. Try one project this weekend. Once you see how easy and fun it is, you’ll want to make more.
Save this guide for later, grab a few supplies, and start turning your garden into a space that feels creative, cozy, and completely you

Leave a Reply