
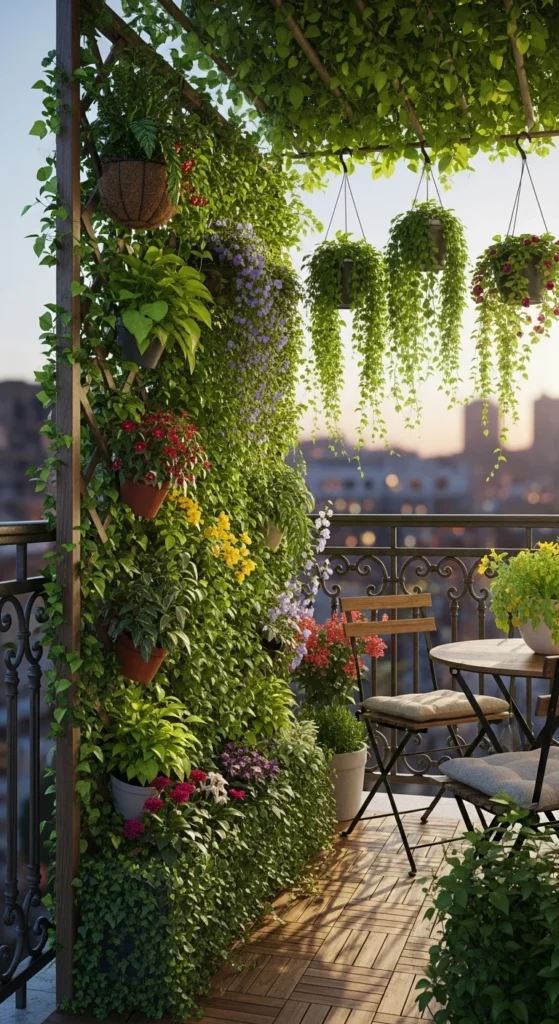
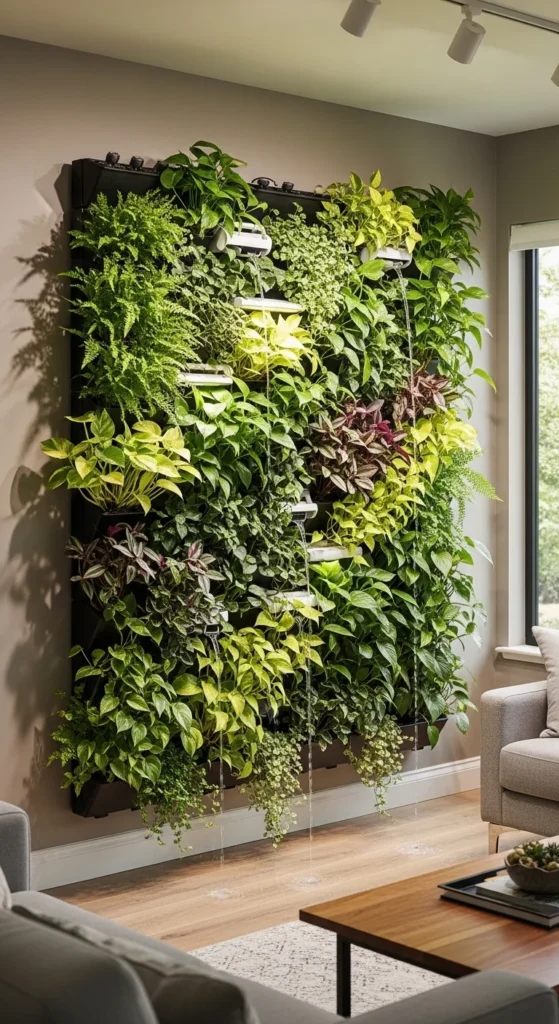
If you’re craving a refreshing green space in your home but lack the floor space for a sprawling garden, a vertical garden might just be the solution. Vertical gardens are the perfect way to bring the beauty of nature into your living space while maximizing limited space. Whether you’re transforming a bare wall or brightening up a small balcony, this DIY project is both fun and rewarding. Let’s dive into how you can create your own vertical garden decor with a few simple steps and materials.
Materials You’ll Need for Your Vertical Garden
Creating a vertical garden doesn’t require professional skills or pricey tools. The materials you’ll need are simple and easy to find. Here’s a list of essentials:
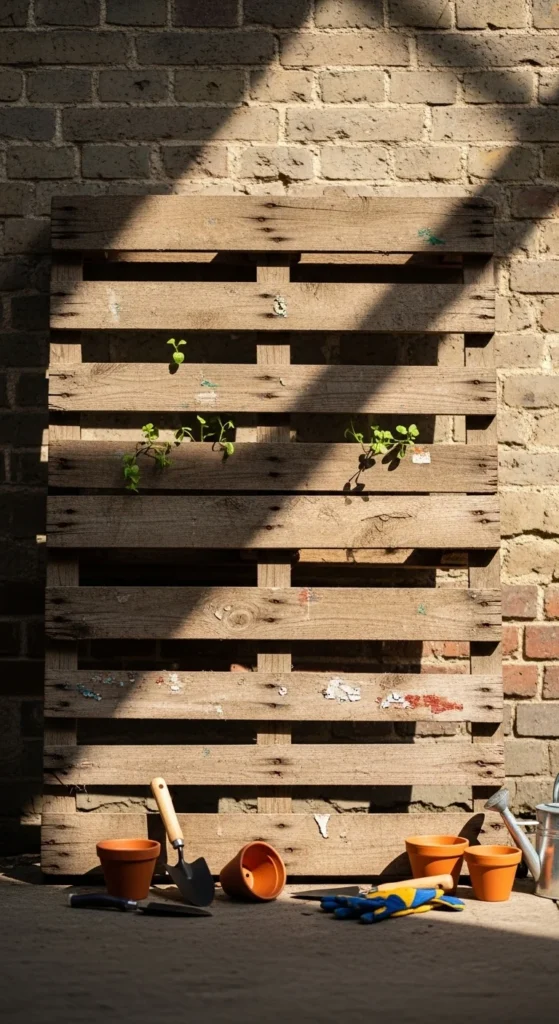
- Wooden frame or pallet: A wooden frame or repurposed pallet serves as the backbone of your vertical garden.
- Gardening fabric: This is used to hold the soil and prevent it from spilling out.
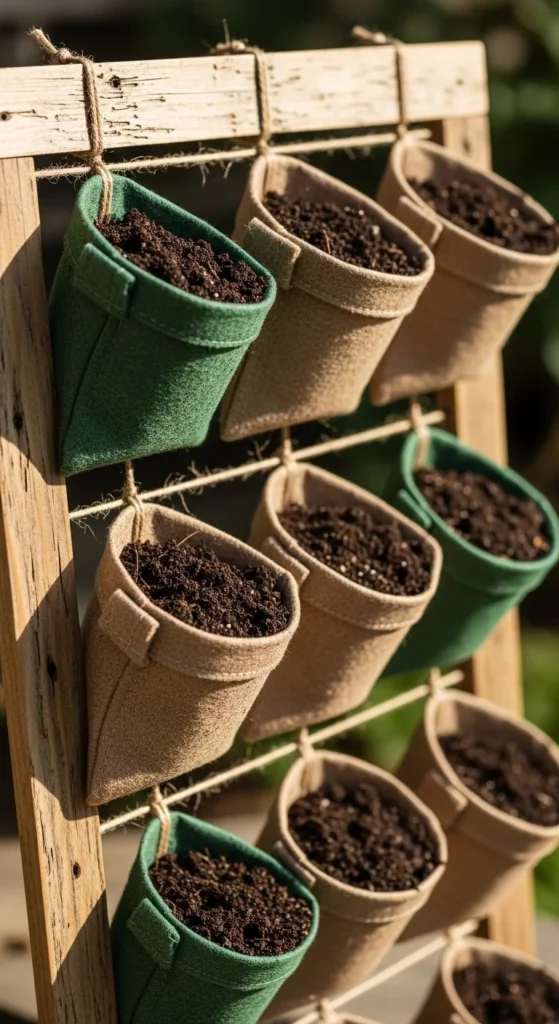
- Plant pots or pouches: You can use small plant pots or fabric pouches for growing your plants.
- Stapler or nails: To secure the fabric to the frame.
- Soil: Opt for lightweight, well-draining soil that works for your chosen plants.
- Plants: Choose plants suited for vertical gardening, like herbs, succulents, or trailing vines.
Once you have everything ready, you’re set to start crafting your vertical garden!
Step-by-Step Guide to Building Your Vertical Garden
Step 1: Prepare the Frame
Start by selecting a suitable frame for your vertical garden. You can use a wooden pallet for a rustic look or a framed structure for something more modern. If you’re using a wooden pallet, make sure it’s sturdy enough to support the weight of the soil and plants.
Step 2: Attach the Gardening Fabric
Cut the gardening fabric to fit the back and sides of your frame. The fabric will hold the soil in place, so it needs to be durable and breathable. Secure the fabric with a stapler or nails, ensuring that it covers the entire back and sides of the frame. Leave enough excess fabric at the bottom to catch any excess water.
Step 3: Install Plant Pouches or Pots
Next, you’ll need to install plant pouches or small pots. You can either sew fabric pouches directly onto the frame or use small pots and attach them using hooks or nails. Make sure to space them evenly for a balanced look. For a more modern touch, you can arrange the pots in a staggered pattern.
Step 4: Add Soil and Plants
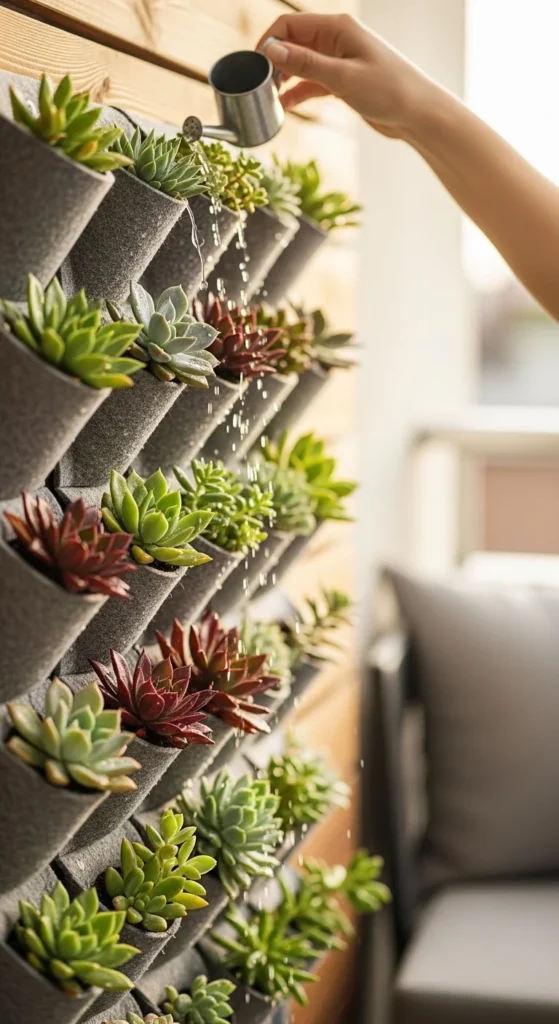
Fill each pot or pouch with soil, making sure it’s light enough to drain well. Select plants that will thrive in your setup. If you’re a beginner, consider using low-maintenance plants like succulents, ferns, or herbs. These plants are easy to grow and perfect for vertical gardens.
Be mindful of the amount of sunlight your plants need. If your vertical garden is located in a shaded area, opt for shade-loving plants. On the other hand, if it’s exposed to the sun, go for sun-loving varieties like basil, lavender, or petunias.
Step 5: Water and Maintain Your Vertical Garden
Once your vertical garden is set up, water your plants according to their needs. Since vertical gardens are usually smaller, the soil can dry out quicker, so be sure to keep an eye on moisture levels. It’s also important to trim and prune your plants regularly to prevent them from becoming overgrown and tangled.
Tips for Maintaining a Thriving Vertical Garden
- Choose the Right Plants: Not all plants are suited for vertical gardens. Look for compact, low-growing plants that don’t need a lot of space. Herbs, ferns, and succulents are great options.
- Use Proper Drainage: Ensure that your vertical garden has proper drainage to avoid waterlogging, which can lead to root rot.
- Give Your Plants Enough Light: Make sure your vertical garden gets adequate sunlight, whether it’s natural or from grow lights.
- Repot When Necessary: As your plants grow, they may outgrow their pouches or pots. Repot them into larger containers if needed.
Conclusion: Create Your Own Green Oasis
Vertical gardens are an amazing way to bring nature into your home without taking up valuable floor space. With just a few materials and a little creativity, you can transform any bare wall or small outdoor area into a lush, vibrant oasis. So, get started on your DIY vertical garden today and enjoy the fresh, green atmosphere it brings to your living space!
Remember to take photos of your progress and share them with friends or on social media – after all, your beautiful vertical garden deserves to be admired!

Leave a Reply